How to set up AWS CodeCommit with Codenvy IDE.
26.11.2017
Recently I needed to set up some private Git repository. I know, it is possible with some free Git hosting providers, but I have an AWS account, so I decided to set up repository with CodeCommit service. Unfortunatelly, I didn't find any decent documentation, how to configure it with Codenvy online IDE. I hope this article would fill the gap.
Basically it is not that hard to set the thing up, but there is a one tricky part. I am writting this article also as a reminder for myself – whenever I'll need such configuration in future, I'll simply read the blog :).
Let's start with small overview, what is AWS CodeCommit and Codenvy IDE. AWS CodeCommit is a managed source control service, enabling you to host private Git repositories. All you need is an AWS account. For the first 5 users, you'll get the service for free, if your usage doesn't exceed certain limits (50 GB of storage per month and 10 000 Git requests per month). You'll also get unlimited number of repositories. Sounds good to me. Codenvy is a cloud based workspace and IDE, based heavilly on Docker, which allows you to develop right inside you browser (even for example from iPad, as I am doing). Also, you can collaborate from your local editor/IDE (or online IDE) with your teammates. Codenvy supports also VCS and Git is of course supported. We have to connect both now.
We need to set up the repository first. Log into the AWS console and go to the CodeCommit service page. On the dashboard, click Create repository button. When clicked, create repository page is raised:
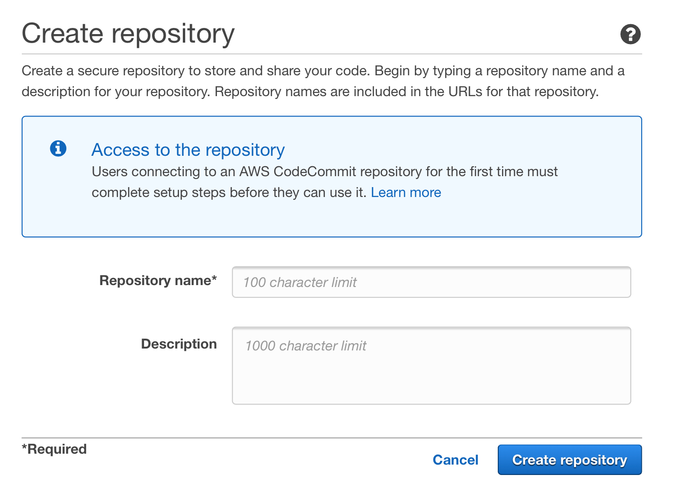
Create repository
Fill the Repository name, optionally Description and confirm. Store SSH URL of your repository for later usage. Now switch to the Codenvy IDE. I suppose, you have a project, which will be pushed to the CodeCommit's repository. Create the repository first – select menu Git – Initialize repository.... Now we need to configure SSH key for Git remote. Codenvy has the functionality for generating keys, hence we can use it. Go to Profile – Preferences – SSH – VCS and use Generate key button. Fill in host name from previously stored SSH URL, e.g. git-codecommit.eu-west-1.amazonaws.com like in my case. Under the Public Key column, press View button and copy public key.
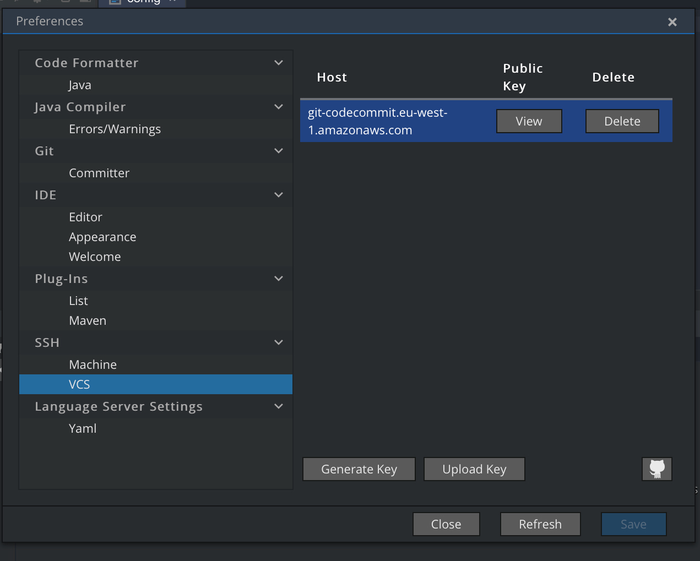
Codenvy keys management
Back to the AWS. Because our repository is currently unreachable from outside, we have to assign the authentication details. There is IAM service for such purposes. Go to Add user, fill Username and select Access type as Programmatic access. In next step, assign required permission. Usually you would like to have full access to the repository, select AWSCodeCommitFullAccess then. Otherwise choose option more suitable for your intention.
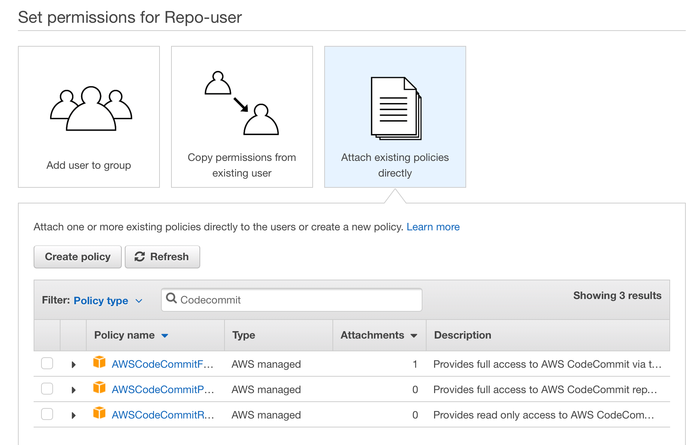
Assigning permissions
Finish user creation. Make sure, you are in Users section, select just created user and go to the Security credentials tab. Click Upload SSH public key button and paste public key obtained from Codenvy in corresponding dialog. When key is imported, copy SSH key ID:

SSH key ID
We are ready with AWS part now, switch to the Codenvy. We'll configure repository, add remote and set authentication. Open again the workspace with project you want to push to the CodeCommit. Now go to the Git – Initialize Repository... and confirm the dialog. For remotes configuration, go to Git – Remotes... – Remotes... and select Add in the following dialog. Fill Name – pick whatever you want and Location – URL we copied in CodeCommit's configuration panel earlier.
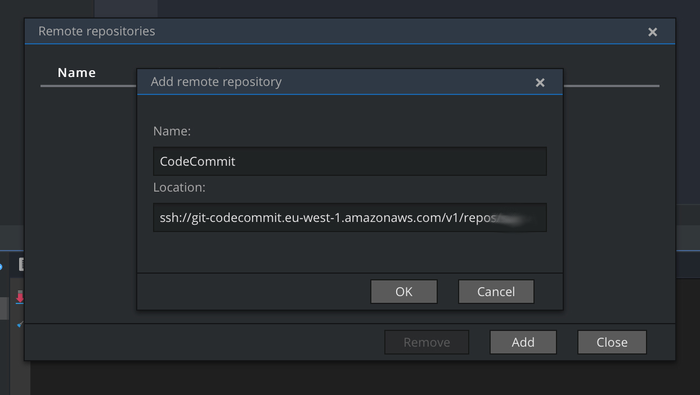
Remote configuration
If we now try to push to the remote repository, it would fail due to the wrong authentication. Here our small trick comes to the show. Because we are using SSH for data transfer, we have to configure it properly. Create file config in root folder of you project. File should look like:
            Host <hostname>
            User <username>
For hostname substitute hostname from SSH URL of your repository (e.g. git-codecommit.eu-west-1.amazonaws.com) and for username use SSH key ID we copied before. When the file is ready, switch to the terminal (at the bottom of screen) and enter cd /home/user/.ssh – change folder to the SSH configuration folder. Then use command cp /projects/<project_name>/config ./, substitute project_name by your project name. Now we are ready and we can use just configured remote repository for fetching and pushing.
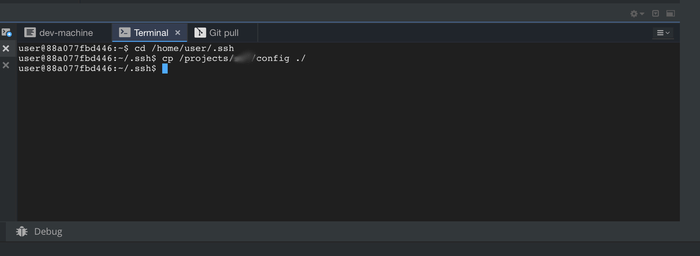
Terminal in Codenvy IDE